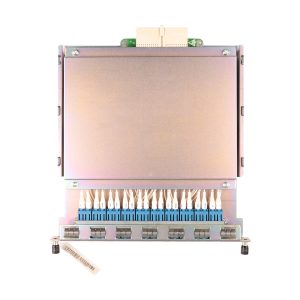
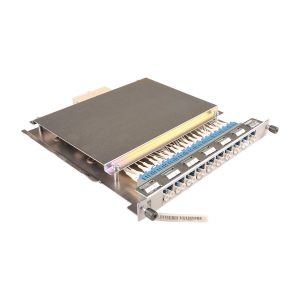
Description
TNF1SCC Version Description
The SCC is available in the following hardware versions: TNF1 and TNF3.
The following provides the board(s) supported by the OSN device. However, the availability of the board(s) is subject to PCNs.
Version description of the SCC:
| Board | Product Applicable-Initial Version | Logical Board Description |
| TNF1SCC | 1800 I&II Compact-V100R001C01 | TNF1: SCC. |
| TNF3SCC | 1800 I&II Compact-V100R005C20 | TNF3: F3SCC and F3STG.
NOTE: Only the logical board F3STG supports 1588v2 and physical-layer clocks. |
TNF1SCC and TNF3SCC version differences
| Item | TNF1SCC | TNF3SCC | |||||||
| Type | TNF1SCC | TNF1SCC02 | TNF3SCC01 | TNF3SCC02 | TNF3SCC03 | TNF3SCC04 | |||
| Version | Version B | Version D | Version E | Version D | Version E | – | |||
| Using the lead-free processing technique | No | No | Yes | No | Yes | Yes | |||
| Ports on the front panel | The number of ports and indicators on the front panel of TNF1SCC is different from that on the front panel of TNF3SCC. For details, see Front Panel (TNF1SCC) and Front Panel (TNF3SCC). | ||||||||
| CLI Management Port | Not supported | Supported | |||||||
| Boards supported | The boards supported by TNF1SCC are different from those supported by TNF3SCC. For details, see Board Category. | ||||||||
| CF card | Not supported | Not supported | Not supported | Supported | Supported | Not supported | |||
| Master/Slave subrack | Supported | Supported | |||||||
| Micro switch | Not supported | Supported | Supported | Supported | Supported | Supported | |||
| Housekeeping alarm input/output port | Supported | Supported | |||||||
| Inter-subrack wavelength protection | Supported | Not supported | |||||||
| UPM management | Supported | Not supported | |||||||
| IEEE 1588v2 | Not supported | Supported | |||||||
| Physical-layer clock | Not supported | Supported | |||||||
| NE database restoration and software upgrade through the USB port | Not supported | Supported | |||||||
| G.8273.2a | Not supported | Not supported | Not supported | Supported | Supported | ||||
| G.8275.1a | Not supported | Supported | |||||||
| Logical fiber connections turn red | Not supported | Supported by V100R006C20 and later versions | |||||||
| IPA | Not supported | Supported by V100R006C20 and later versions | |||||||
| Optical cross-connection | Not supported | Supported by V100R006C00 and later versions | |||||||
| OPA | Not supported | Supported by V100R006C00 and later versions | |||||||
| Optical Doctor (OD) | Not supported | Supported by V100R006C00 and later versions | |||||||
| Fiber Doctor (FD) | Not supported | Supported by V100R006C20 and later versions | |||||||
TNF1SCC Application
The SCC works with the NMS to manage the boards and transmits various maintenance and management signals. The TNF3SCC (F3STG) board supports IEEE 1588v2 and physical-layer clocks.
TNF1SCC Functions and features
| Functions and Features | Description |
| Basic function | Works with the NMS to manage the boards in the equipment and enables communication between equipment. |
| Processes the related overheads. | |
| Processes two optical supervisory channels, and receives and transmits the OSC signals. | |
| Provides one 3-input/1-output alarm port. | |
| DCN | Supports ESC and OSC functions. NOTE: The OSC function on an SCC board applies to a network consisting of only compact OptiX OSN 1800s. The board uses FE optical ports, which cannot be interconnected with OSC optical ports on other boards. |
| L2 switch | Achieve IP communication between subracks. |
| Clock function | TNF1SCC: NE-level clock synchronization is not supported. TNF3SCC: |
| Implements clock synchronization on an NE, and provides system clock signals and frame header signals for service boards. The clock signals comply with ITU-T G.813 and ITU-T G.823. | |
| traces the external clock source, service clock source, or local clock source, and provides synchronization clock sources for itself and the system. | |
| Supports IEEE 1588v2 time synchronization. | |
| Supports one external clock input/output and one external time input/output. | |
| Supports extraction, insertion, and processing of SSM information and clock IDs. | |
| The TNF3SCC03 and TNF3SCC04 boards support G.8273.2/G.8275.1. | |
| The TNF3SCC01 and TNF3SCC02 boards support G.8275.1. | |
| Subrack cascading | Supports subrack cascading. |
| Fan alarm management | Provides power supplies to fans, supports fan speed adjustment and fan fault detection, and manages fan alarms. |
| Power supply management | Supports a backup power supply, checks whether the power input boards can be detected checks whether overvoltage occurs on the power input boards, and shuts down the power input boards when detecting that the voltage of the input power is low. |
Ways of Board Acceptance
Before a board is delivered, it has to be tested strictly. Therefore, you need to test only the basic functions of the board on-site as required.
Insert the SCC board. Make sure that the board is powered on normally, the board is started normally, and the indicators on the board run normally.
Press the LAMP button on the board. The indicators on the board run normally.
Press the RST button on the board. The board is reset (cold) successfully.
Connect the NMS computer to the ETH1 or ETH2&OAM port on the board by using an Ethernet cable. Run a ping command. The returned result of the command shows that the reported IP address of the ETH1 or ETH2&OAM port is correct. In addition, the alarm indicator for each port blinks normally.
On the NMS, view the alarms generated on the SCC board. No abnormal alarm is reported.
On the NMS, perform a warm reset on the SCC board. The operation is successful.
Precautions
In the case of the OptiX OSN 1800, the NE ID and IP address stored on the SCC board are set by using the software. If the SCC board needs to be replaced in the software upgrade process, ensure that NE IDs and IP addresses are unique.
In the software upgrade process, the communication between the NMS and the GNE must be normal. Otherwise, the upgrade fails.
The following operations cannot be performed on an NE at the same time: backing up or restoring the NE data, loading the NE software, and loading board software.
In the process of copying or activating upgrade software, if the operation fails, the loading state is displayed as abnormal. In this case, the upgrade software needs to be reloaded. If loading the new software fails, you need to roll back the software to the original version.
Before replacing the SCC, back up the configuration to the NE database. After the new SCC is installed, issue the configuration to the SCC through the NMS. Replacement of the SCC does not interrupt the services.
You can use the LAMP button on the SCC board to restore the default IP address of the equipment on site. Press the LAMP button on the SCC board and hold it for five to ten seconds. Then, release the button and wait for five to ten seconds. Press the button again and hold it for more than five seconds, and then release the button. In this manner, the IP address of the equipment can be restored. The default IP address is 129.9.191.240.
TNF1SCC Valid Slots in the Subracks
| Chassis | Valid Slots |
| 1800 I Compact Chassis | Slot 2 |
| 1800 II Compact Chassis | Slot 8 |


Reviews
There are no reviews yet.